
Do you find yourself staring at a broken tail light on your 1998 Jeep Wrangler, unsure of how to fix it? You’re not alone.
A faulty tail light not only detracts from your Jeep’s rugged appearance but can also lead to safety hazards and unwanted fines. The good news is, replacing your Jeep’s tail light assembly is much easier than you might think. In this guide, you’ll discover a straightforward, step-by-step process that will have your Wrangler looking and performing at its best in no time.
Imagine the satisfaction of tackling this task yourself, saving money, and ensuring your Jeep stays road-ready. Let’s dive into the process, and by the end, you’ll feel like an expert, ready to take on any challenge your Jeep throws your way.
Tools And Materials Needed
Replacing the tail light assembly on a 1998 Jeep Wrangler requires some preparation. Gathering the right tools and materials is essential. This ensures a smooth and efficient process. Let’s explore what you need to get started.
Essential Tools
You will need a few basic tools for this task. A Phillips screwdriver is necessary. It helps in removing and securing screws. A flathead screwdriver may also be needed. It assists in prying off the tail light cover. A socket wrench set will be useful. This tool helps in loosening bolts. Keep a flashlight handy. It aids visibility in darker areas. Lastly, have some gloves ready. They protect your hands from sharp edges.
Required Materials
For materials, ensure you have the new tail light assembly. Verify it matches your Jeep Wrangler model. Purchase replacement bulbs if needed. It’s wise to have these on hand. You might also want some electrical tape. It helps secure any loose wiring. A clean cloth will be useful. Use it to wipe down surfaces. This prevents dirt from entering the assembly.
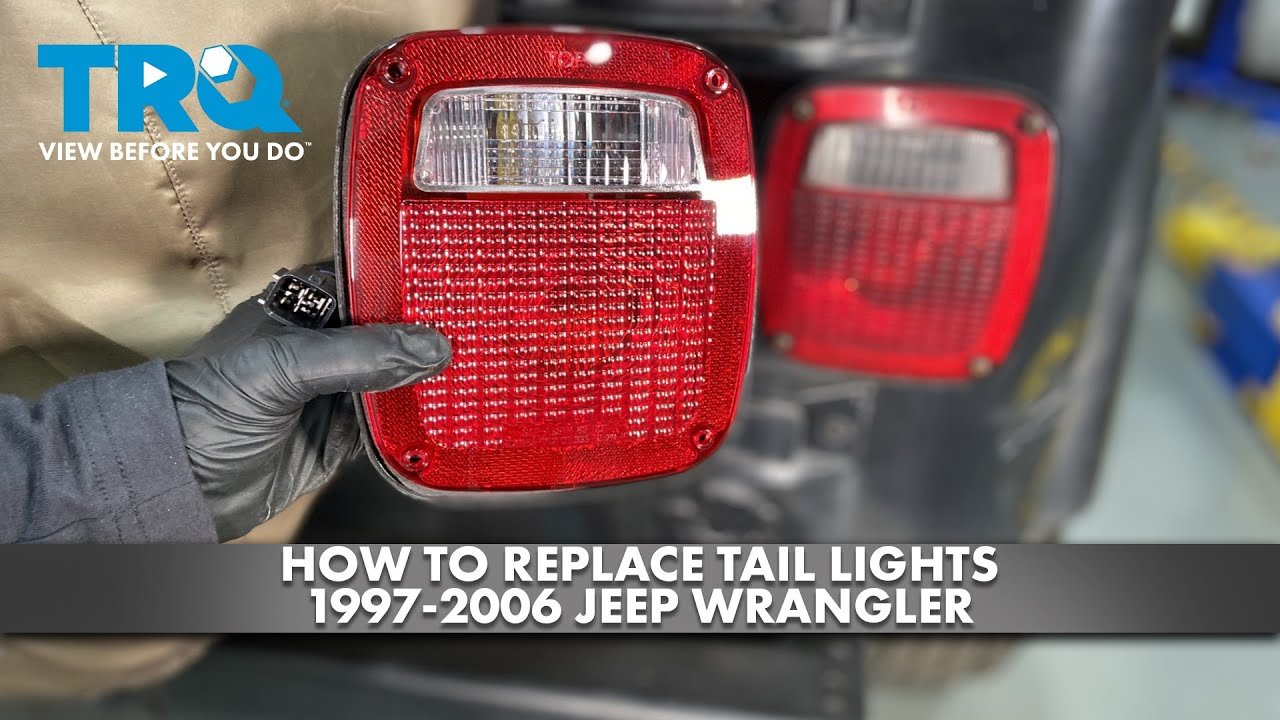
Credit: www.youtube.com
Preparing Your Vehicle
Easily replace the tail light assembly on your 1998 Jeep Wrangler. Gather necessary tools, such as a screwdriver. Remove screws holding the tail light in place. Disconnect the wiring gently. Install the new assembly, ensuring connections are secure. Finish by tightening the screws and testing the light.
Preparing your vehicle for a task like replacing the tail light assembly on a 1998 Jeep Wrangler is essential for a smooth and safe repair process. Before diving into the actual replacement, taking the time to ensure your vehicle is ready can save you a lot of hassle and prevent any potential mishaps. This preparation involves a few key steps to ensure your vehicle is safe and stable, making your DIY project more enjoyable and less stressful.Safety Precautions
Safety should always be your top priority. Before you start, make sure your Jeep is parked on a level surface to prevent any accidental movement. Engage the parking brake to keep the vehicle stable. It’s also wise to wear safety gloves and goggles to protect your hands and eyes from sharp edges or unexpected debris. Think about using wheel chocks behind the tires as an extra precaution. This small step adds an additional layer of security. Have you ever had a project go wrong because of a simple overlooked detail? This is your chance to avoid that by being thorough.Removing Battery Connection
Disconnecting the battery is a crucial step you shouldn’t skip. Locate the battery under the hood and use a wrench to loosen the nut on the negative (-) terminal. Carefully remove the cable and set it aside to prevent any accidental contact. Why is this so important? Removing the battery connection eliminates the risk of electrical shock or short circuits while working on the tail light assembly. This simple action not only protects you but also ensures the electrical system of your Jeep remains intact. Taking the time to prepare your vehicle properly might seem tedious, but it lays the groundwork for a successful repair. Are you ready to continue with confidence, knowing you’ve set yourself up for success?Removing The Old Tail Light
Gently remove the screws holding the old tail light. Carefully detach the wiring connector. Slide the old assembly out.
Removing the old tail light from your 1998 Jeep Wrangler might seem like a daunting task, but with a little patience and the right guidance, it’s quite straightforward. Whether you’re a seasoned DIY enthusiast or just beginning your journey into vehicle maintenance, this task is within your reach. With a few simple tools and some basic know-how, you can easily tackle this project and have your Jeep looking good as new.Unscrewing The Tail Light
Begin by gathering your tools. A Phillips head screwdriver is usually all you need. Approach the tail light from the rear, and you’ll find several screws holding the assembly in place. Carefully unscrew these, setting them aside in a safe spot. It’s surprisingly common for small parts to go missing during projects like this. Have you ever spent more time looking for misplaced screws than actually removing them? Once unscrewed, gently pull the tail light assembly away from the vehicle body. You might feel some resistance, so ease it out carefully to avoid damaging the paint or the assembly.Disconnecting Wiring Harness
With the tail light assembly pulled out, you’ll see the wiring harness connected to the back. This is the power source for your tail lights. Press the tab on the wiring connector to release it. Wiggle it gently if it feels stuck—forcing it can cause damage. As you disconnect the wiring, take a moment to inspect the connectors. Are they clean and free of corrosion? A quick clean might save you future headaches with electrical issues. By breaking down the process into these simple steps, you make the task more manageable. What other vehicle maintenance tasks have you been putting off because they seemed too complex? The satisfaction of completing this small job might just motivate you to tackle more.Installing The New Tail Light
Replacing the tail light assembly on a 1998 Jeep Wrangler is straightforward. Start by removing screws and disconnecting the wiring. Install the new assembly by reversing the removal steps, ensuring all connections are secure. This quick fix enhances safety and restores your vehicle’s appearance.
Replacing the tail light assembly on your 1998 Jeep Wrangler can be a satisfying DIY project. It’s a great way to ensure your vehicle stays safe and road-ready. Installing the new tail light involves a couple of crucial steps that you’ll want to follow carefully. Let’s dive into the process with an emphasis on connecting the new wiring and securing the new assembly.Connecting New Wiring
Before you start connecting the new wiring, make sure the Jeep is off and the keys are out of the ignition. Safety first! Carefully match the wires from the new tail light to the existing ones. Usually, they are color-coded, making it straightforward. Connect them using wire connectors, ensuring a snug fit. Have you ever wondered why the wires are color-coded? It’s to make the installation process simpler and avoid confusion. Think of it as a puzzle where each piece has only one perfect match.Securing The New Assembly
Once the wiring is connected, it’s time to secure the new tail light assembly. Position the new assembly where the old one was removed. Use the screws or bolts that came with the new tail light to fasten it securely. Tighten them with a screwdriver, making sure there’s no wobble. Does the assembly feel secure? Give it a gentle shake to check. A secure fit is crucial to prevent the tail light from falling off during bumpy rides or adverse weather conditions. — By following these steps, you’re not just replacing a tail light; you’re ensuring your Jeep maintains its rugged reliability. Share your thoughts and experiences in the comments! Have you encountered any hiccups while replacing parts on your Jeep?Testing Your New Tail Light
After replacing the tail light assembly on your 1998 Jeep Wrangler, ensure proper function by testing the new installation. Turn on the lights and check for brightness and stability. Confirm brake and signal lights operate correctly to guarantee road safety.
Once you’ve installed your new tail light assembly on your 1998 Jeep Wrangler, it’s time to ensure everything works perfectly. Testing your new tail light is a crucial step that confirms your vehicle is safe for the road. You don’t want to drive away only to find out later that something isn’t working as expected. This process is straightforward, and with a few simple checks, you can be confident in your installation.Verifying Electrical Connections
Begin by turning on your Jeep’s ignition without starting the engine. This allows the electrical system to be active, making it easier to check the lights. Carefully inspect the wiring connections you made during installation. Are the connectors secure and free from corrosion? Loose connections can result in flickering lights or complete failure. Next, recruit a friend or family member to help. Ask them to press the brake pedal while you observe the tail light. Does the light illuminate brightly without any flickering? If it does, you’ve likely made solid electrical connections. If not, recheck the wiring and ensure everything is tightly connected.Ensuring Proper Functionality
Now, it’s time to test the full range of the tail light functions. These include the brake lights, turn signals, and reverse lights. Start by activating each function one at a time, and observe the tail light’s response. Does the turn signal flash at the correct speed? Slow or fast blinking can indicate a problem with the bulb or wiring. Consider this: when was the last time you really thought about the importance of your tail lights? They are essential for safe driving, especially at night or in adverse weather conditions. If any function isn’t working as it should, troubleshoot the issue immediately. Often, a quick fix like adjusting the bulb or checking the fuse is all it takes. Testing isn’t just about ensuring everything is connected. It’s about guaranteeing your safety and the safety of others on the road. Take the time to do it right. After all, wouldn’t you rather address a minor issue now than face a potential hazard later?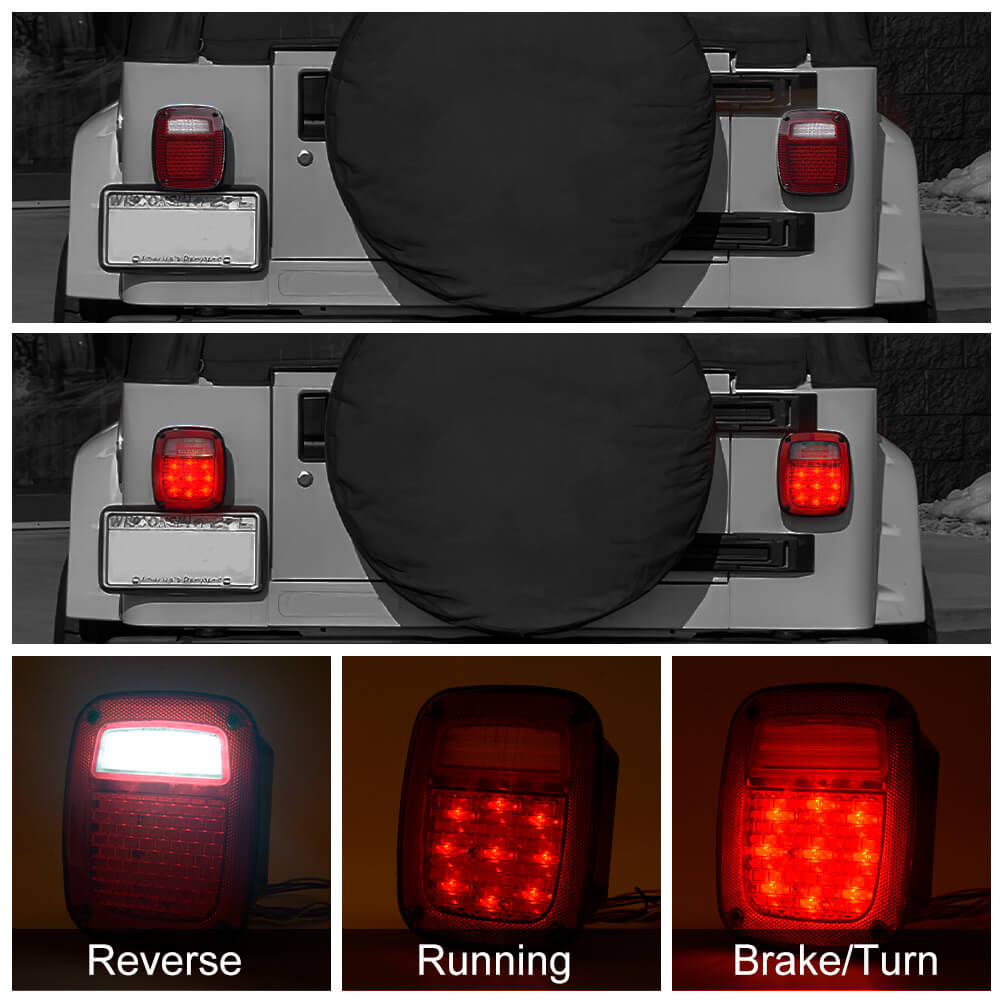
Credit: loyo-led.com
Troubleshooting Tips
Replacing the tail light assembly on a 1998 Jeep Wrangler can be tricky. Sometimes, even after following steps, issues may arise. This section aims to help you troubleshoot common problems. Follow these tips to ensure a smooth installation process.
Common Installation Issues
Misalignment is a frequent problem. Ensure the assembly fits snugly. Double-check screws and bolts. Loose screws can cause vibration. This leads to quick wear and tear. Another issue is incorrect bulb placement. Verify the bulbs sit correctly. Proper placement ensures optimal light output. A wrong fit can lead to dim lighting.
Fixing Wiring Problems
Wiring issues often occur during replacement. Check for damaged wires first. Broken wires can disrupt the connection. Ensure all connections are secure. Loose wiring can cause malfunction. Use electrical tape for added security. This prevents wires from getting loose. Also, inspect the fuse box. A blown fuse can affect the tail light function. Replace any faulty fuses promptly.
Maintenance Advice
Maintaining your 1998 Jeep Wrangler’s tail light assembly ensures safety and longevity. Regular maintenance can prevent costly repairs and ensure your lights work properly. Here’s how to keep your tail light assembly in top shape.
Regular Inspection
Check the tail lights often. Look for cracks or moisture inside. Damaged lights can reduce visibility at night. Inspect the wiring for wear or corrosion. Faulty wiring might cause lights to malfunction. Regular inspections catch issues early. This saves time and money.
Cleaning Tips
Clean the tail lights regularly. Use a soft cloth and mild soap. Avoid harsh chemicals; they can damage the lens. Remove any dirt or debris gently. This improves visibility on the road. Ensure lights are clean before trips. Clean lights keep you safe.
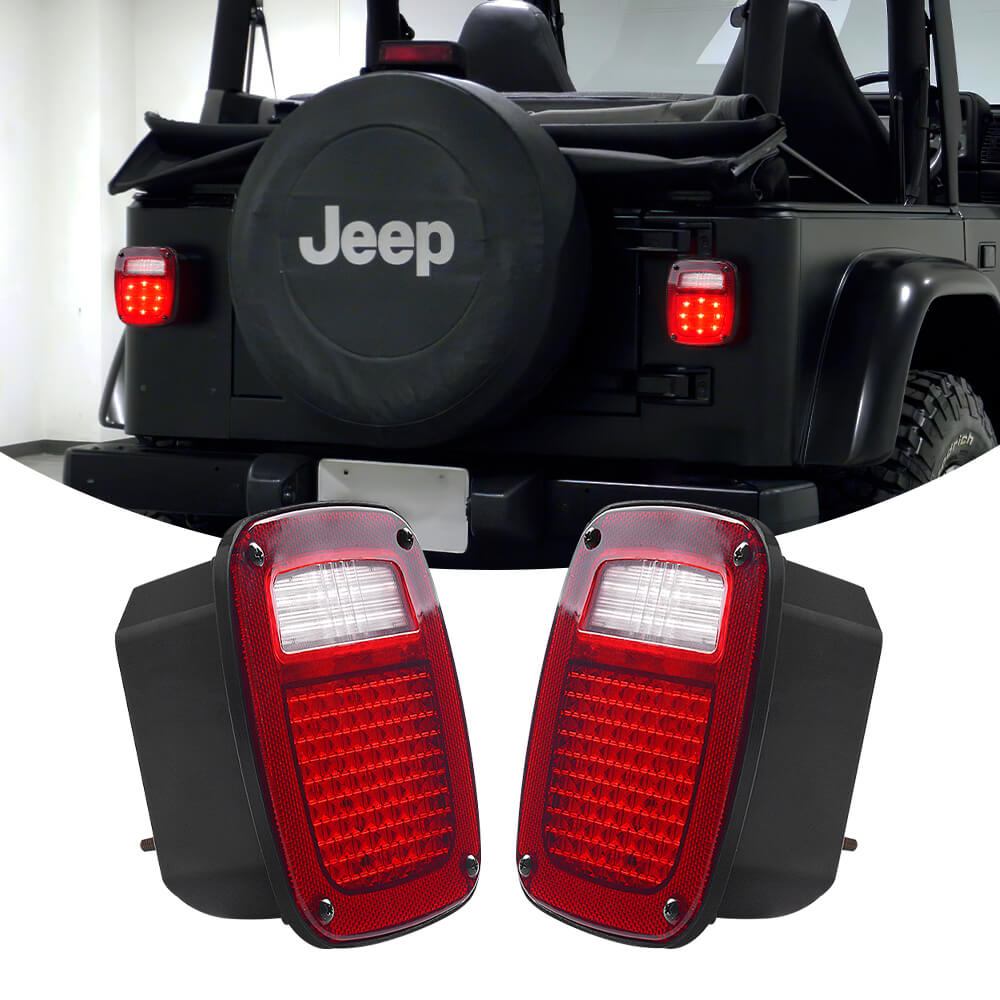
Credit: loyo-led.com
Frequently Asked Questions
Can I Replace The Tail Light Assembly Myself?
Yes, you can replace the tail light assembly yourself. It’s a straightforward process requiring basic tools. Always consult your vehicle’s manual for guidance. Ensure you disconnect the car battery first for safety. Properly secure the new assembly to avoid any issues.
Check all connections before finishing.
Does Autozone Replace Tail Light Assembly?
AutoZone does not offer tail light assembly replacement services. They sell parts for DIY installation. Visit your local AutoZone for assistance with finding the right tail light assembly for your vehicle. Their staff can offer guidance and advice on installation if needed.
Is Having A Broken Tail Light Illegal?
Yes, having a broken tail light is illegal in most places. It can result in fines or penalties. Functioning tail lights ensure visibility and safety on the road. Regularly check and maintain your vehicle’s lights to avoid legal issues.
How To Take The Tail Light Off A Jeep Wrangler?
Locate the screws securing the tail light on your Jeep Wrangler. Use a screwdriver to remove them. Gently pull the tail light assembly out. Disconnect the electrical connector to fully remove the tail light. Follow these steps in reverse to reinstall the tail light.
Conclusion
Replacing the 1998 Jeep Wrangler tail light assembly is straightforward. Gather your tools. Follow the steps methodically. First, remove the old assembly. Next, install the new one. Ensure all connections are secure. Test the lights to confirm they work. A successful replacement improves safety on the road.
You can do this with basic tools and patience. Save money by handling it yourself. Enjoy a safer, well-lit drive in your Jeep. Remember, maintenance keeps your vehicle in top shape. Happy driving!